After reviewing thousands of suggestions, we handpicked a select few that proved exceptionally helpful in our own work. Keep them in mind—they’re likely to benefit you as well.
Family Handyman
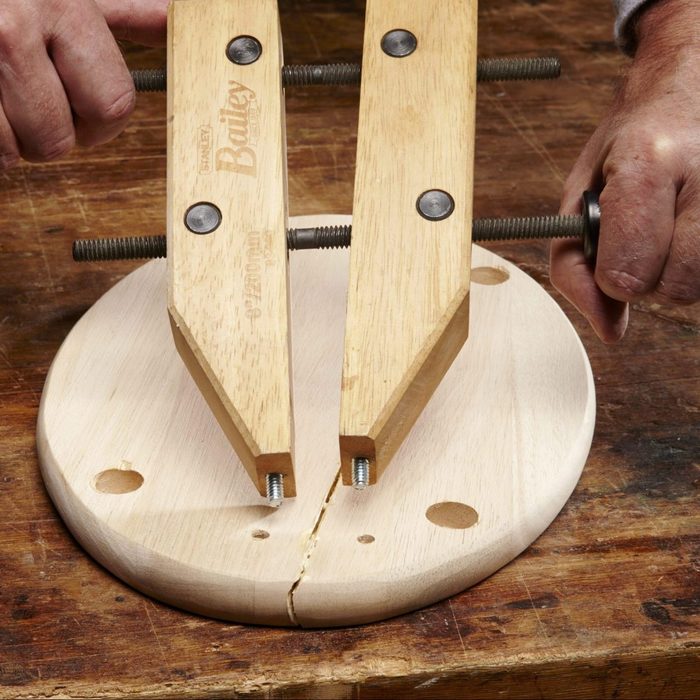
19/19 Hand Screws to the Rescue
Although quick-release metal clamps are generally more efficient for everyday use, wooden hand screws shine in specialized applications. Their adjustable jaws can grip angled or uneven surfaces, and their wooden construction allows for easy modifications—such as cutting, drilling, or adding hardware. For example, clamping an oval stool seat can be tricky with standard clamps, but hand screws equipped with hanger bolts simplify the process. Just drill a few holes into the seat, insert the bolts, and tighten the clamp to hold the piece securely.

Family Handyman
18/19 Upright for Edge Work
A woodworking vise is ideal for securing boards on their edge, but two hand screw clamps can serve as an effective alternative. To prevent the sharp threads of the clamps from damaging the board, consider placing thin cardboard strips between the jaws and the wood, depending on your setup.

Family Handyman
17/19 Straight-Up Drill Guide
Drilling a perfectly vertical hole typically requires a drill press—but you can achieve the same result using two scrap wood pieces joined at a right angle. The corner they form guides the drill bit straight down with consistent accuracy. That said, if you’ve been eyeing a drill press purchase, feel free to ignore this workaround.

Family Handyman
16/19 Instant Saw Support
Basic T-blocks are incredibly versatile in the workshop. They can support extended boards, elevate workpieces for easier access, hold assemblies aloft to allow clamp placement underneath, or even serve as drying racks during finishing. Crafted from leftover wood, these simple aids quickly prove their worth—and you’ll likely discover even more creative uses as you go.

Family Handyman
15/19 Perfect Worktable
Don’t toss that old hollow-core door—it makes an excellent makeshift worktable. Place it across two sawhorses, and you’ve got a sturdy, flat, and lightweight surface that’s both functional and easy to stow away when not in use.

Family Handyman
14/19 Recharge Station
Cordless tools may not be humanity’s greatest achievement, but for many of us, they come pretty close. However, they often create a tangled mess of chargers. A practical solution is to gather all your chargers in one designated spot and connect them to a single power strip. This setup offers neat organization, built-in surge protection, and a simple way to power everything down once your batteries are fully charged.

Family Handyman
13/19 Magnetize a Screwdriver
This classic tip can spare you countless dropped screws over the years. Simply take a magnet and stroke it along the shaft of your screwdriver around a dozen times, always in the same direction—similar to how you’d hone a blade. In just a few seconds, your screwdriver will become magnetized, making screw handling much easier. Reapply as necessary. For even more magnetic utility, consider installing a magnetic strip in your workshop for tool storage and quick access.

Family Handyman
12/19 Two-Stage Speed Painting
Rollers are great for covering surfaces quickly, while brushes provide a smoother, more refined finish. To combine the advantages of both, apply the paint with a roller, then immediately follow up by brushing it out. The sooner you begin brushing, the better the result—especially in warm, dry weather where paint can start drying within minutes, reducing its ability to level out smoothly.

Family Handyman
11/19 Belt-Sander Stop Block
A belt sander can easily turn your workpiece into a projectile if not properly secured. To prevent this, clamp a stop block to your workbench to keep the board in place. Using a block that’s the same thickness as your material also helps keep the sander level, reducing the risk of accidentally tapering the end of your board.

Family Handyman
10/19 Clamp a Nail
When swinging a hammer isn’t an option due to tight space, a C-clamp can get the job done. Use it to press nails into place—ideal for securing plumbing straps, electrical boxes, junction boxes, or even joist hangers where clearance is limited.

Family Handyman
09/19 Stop a Wandering Bit
Even the most precise drill bit can slip on hard surfaces like tile, glass, or metal, often leaving behind unwanted scratches. To keep the bit steady at the start, provide a softer entry point. Firmly taping a piece of thin cardboard—like that from a cereal box—onto the surface gives the bit the grip it needs to drill accurately.

Family Handyman
08/19Extract a Stuck Plug
Wrestling a stuck plug out of a hole saw can be frustrating—but a screw is the perfect solution. Drive a long screw into the wooden plug; as it reaches the back of the hole saw, continued turning will push against the saw and pull the plug free. For extra-stubborn plugs, insert a second screw on the opposite side of the center bit and alternate turning each screw until the plug releases.

Family Handyman
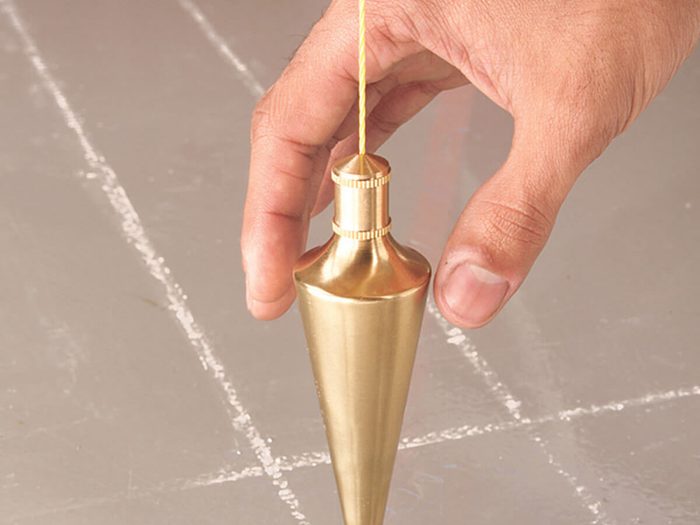
07/19 Is Your Level a Liar?
Long ago, a man unknowingly used a faulty level to build his home—resulting in slanted floors, crooked walls, and endless headaches when it came to fitting cabinets and hanging doors. To avoid a similar fate, give your level a quick one-minute test. Place it on a flat surface and use a shim to center the bubble. Then rotate the level end-for-end, placing it back on the same shim point. If the bubble no longer centers, the level is giving false readings. Use the same method vertically against a wall to check for plumb accuracy.

Family Handyman
06/19 Final Paint-Prep Step
According to a painter with 35 years of experience, thorough preparation is the foundation of a flawless paint job. His process begins by patching any imperfections in the walls, followed by sanding the entire surface with 100-grit sandpaper using a drywall pole sander. This generates a layer of dust and debris, which he removes using a vacuum with a wide floor brush—quicker and more effective than a damp cloth, and it clears out cobwebs too. For corners and tight spots, a rag or a small vacuum attachment does the trick. Once clean, the next step is taping off the wood trim.

Family Handyman
05/19 Belt Sanders Aren’t Just for Wood
Any shop teacher will stress the importance of using each tool strictly for its designated task. Still, I often break that rule—especially with my belt sander. Beyond smoothing wood, it’s excellent for cleaning dried residue off tools like putty knives and trowels. I also rely on it to sharpen chisels, scrapers, and even garden shovels. In fact, I’m guilty on two counts: I put my chisel through tough, improper tasks, then restore its edge using the belt sander. Surprisingly, it gives a finer edge than my bench grinder. —Jeff Gorton, Associate Editor

Family Handyman
04/19 Tool Case Surgery
Fitting a tool back into its molded plastic case can feel like solving a puzzle designed to test your intelligence. To simplify things, cut away the snug compartments, and you’ll make room for the original tool—or even a different power tool—without the hassle. An oscillating tool is ideal for making these precise cuts.

Family Handyman
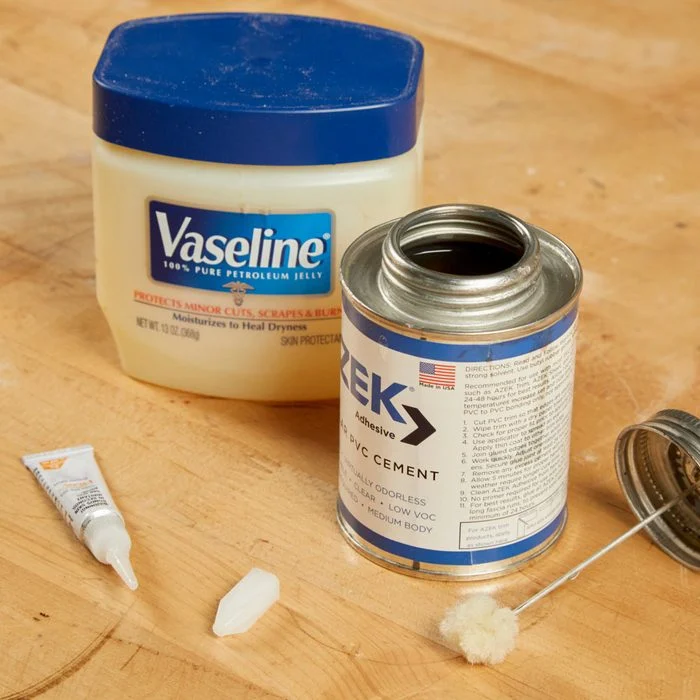
03/19 A New Use for an Old Paintbrush
When your paintbrushes reach the end of their life, don’t toss them just yet. Use needle-nose pliers and a bit of force to remove the metal ferrule, then repurpose the wooden or composite handle as a push stick for your table saw. Since push sticks are easy to misplace, it’s smart to have extras on hand—and this method offers a practical way to create a few spares.

Family Handyman
02/19 Essential Workbench Accessory
A protruding nail or screw beneath your workbench can double as a convenient bottle opener—always within reach when you need it.

Family Handyman
01/19 Reverse Circular Saw Blade for Clean Cuts
Using a standard saw blade on vinyl siding often results in rough, jagged cuts. To achieve a cleaner edge, install the blade backward—this reduces tearing and produces a smoother finish.
Leave a Comment